
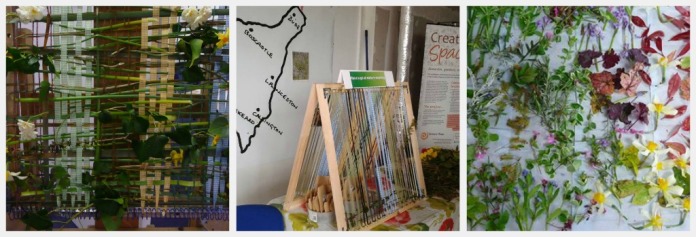
In April we had an activity stand at an Age UK event where we invited carers and people living with dementia to have a go at weaving flowers, leaves and stems into our loom. This proved to be a really successful activity as weaving seems to require just the right level of concentration and hand movement to relax people and encourage conversation. Have a go yourself, you’ll find you soon become lost in the rhythmical action of weaving.
We had a few people ask how they can replicate the activity for day centres, care homes, activity clubs etc so here is a step by step guide to making your own wooden loom;
The loom we made was double sided to enable two people to weave at the same time. The final size was a 70cm square. This fits nicely on top of a table but you may wish to change the sizes to suit your environment.
You will need
- 8 x 70cm lengths of wood – i went for 8cm width and 3cm depth pieces
- Wood glue
- Duct tape or similar
- 8 x metal corner braces (usually come in a pack of 4 with screws)
- Pack of 2 hinges
- Optional gate mechanism to keep the loom open called a ‘cabin hook’
- Screw driver
- Saw and tape measure if you don’t have the exact lengths of wood
- Pack of small nails
- Hammer
Step 1
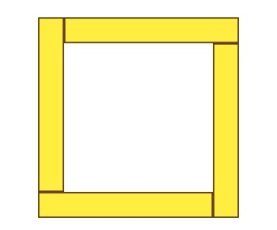
Cut your wood to 8 identical lengths and arrange into two squares. In order to make a more rigid square it is best to lay out the pieces in a continuous square formation as shown below.
Step 2
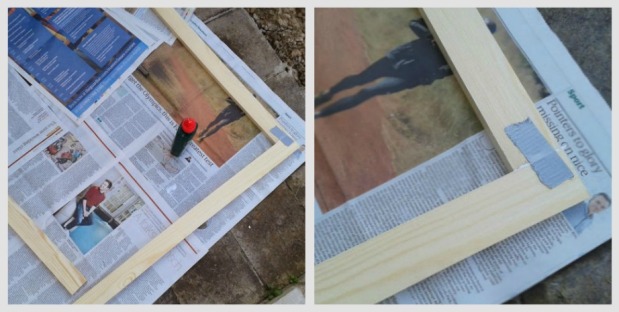
First you will need to glue the two opposite corners. Put a line of wood glue on one end of wood and hold it to the joining piece for a few minutes, then carefully tape the corners together to secure the joint whilst drying. Leave to dry for a few hours. Repeat with the other square so that you have 4 of your 8 corners glued.
Step 3
Once the glue has dried and the corners feel solid its time to glue the other ones. This is slightly more tricky as you will need to put the two together at the same time to form the square so an extra pair of hands is helpful at this point but not essential. Glue both corners then repeat as above and leave to dry. Do this on both squares.
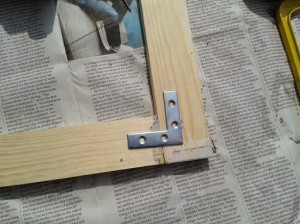
Step 4
Once the glue has dried on both of the frames you can add the corner braces to provide some extra support and rigidity. Screw them into each corner about halfway into each corner. If you have a thin piece of wood the screw might come through to the other side in which case you will need to file the screws down with a metal file.
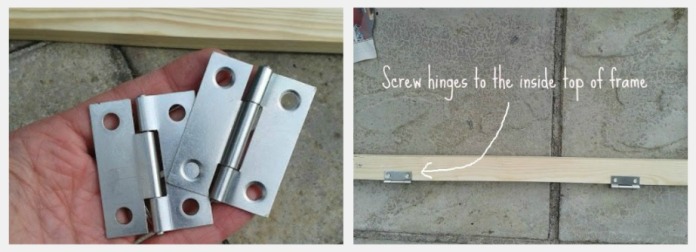
Step 5
Now you can join the two frames together to make an A frame style loom. Screw the first hinge about a quarter of the way along the top of one of the frames, at this point you may want to work out which are your neater edges and sides and thus which way up you would like the loom. Screw the other hinge onto the same piece of wood about a quarter of the way in from the other side. You will now need to lay the two frames out with the two tops nearly touching in order to screw down the other side of the hinge.
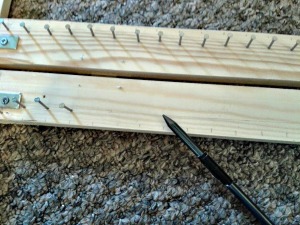
Step 6
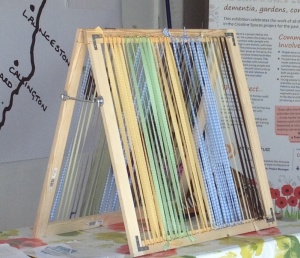
You now have your basic A frame structure ready to become a loom. In order to turn it into a loom you will need to add a line of nails to the top and bottom edges (this will give you the basis for your warp). You can either do this by eye or mark them out with a pencil first. I marked them 2 cm intervals but it’s up to you how far apart you’d like to space them.
Step 7
Now for the fun bit, choose some wool, ribbon or string and loop it around the top and bottom nails to create your warp. You will want to get as much tension as possible to hold your nature weaving (weft) in place.
Step 8 (optional)
You may wish to add a foldable arm to you frame to ensure that it doesn’t slide open or fall over. I used something called a cabin hook available from a local DIY store, it is 15 cm long and i positioned it about half way down the loom which allowed the loom to stay open about 40cm.

